Makers Gotta Make
BLOG

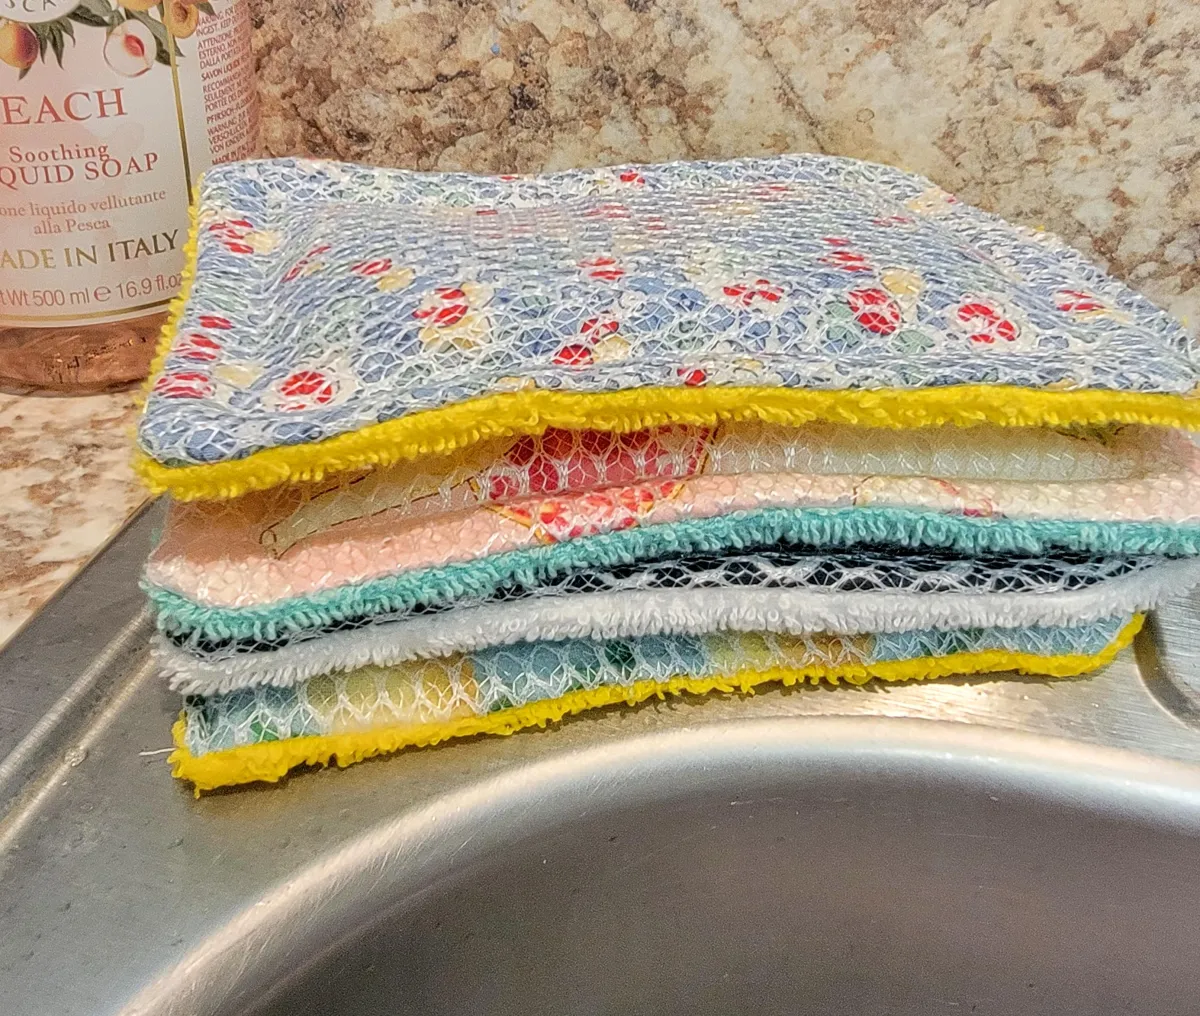
DIY Zero-Waste Kitchen Sponges {Sew Sustainable}
There are so many compelling reasons to make your own zero-waste, reuseable kitchen sponges! Let us count the reasons:
I'm just gonna say it. Those store-bought ones are ugly (at the very least unattractive). You’ll never find sponges that are as cute (or match your kitchen) as the ones you make.
Disposable sponges are wasteful for the environment and costly for you.
Disposable kitchen sponges are made with microplastics that shed every time you use them. They wash down your drain and into the ocean. Where they sit forever.
This project is fabric scrap buster. It’s the perfect way to use those sweet fabric scraps you’ve been
hoardingsaving.
No matter why you make them, scrubby kitchen sponges are easy-peasy to make. This is a quick sewing project that can be easily completed in an hour. My favorite part is that I have full creative control of the beautiful fabric choices!
*This post contains affiliate links. If you use these links to buy something, we may earn a small commission at no cost to you. See our full disclosure and privacy policy statements here.

How to Make Reuseable Kitchen Sponges
This sponge project is so easy that you’ll be able to make one in under an hour. Once you’ve got the hang of it, you’ll whip out three in an hour.
Gather Your Materials and Supplies
Cotton Fabric (5”x 7” inches or larger)
Terry Cloth Fabric (5”x 7” inches or larger) - You can also cut mesh from a lingerie bag from the dollar store.
Mesh (5”x 7” inches or larger)
Approx. ½” Thick Polyester Batting (3” x 5’ inches or larger)
Rotary Cutter (or Scissors)
*Quilt Ruler (Only necessary if you’re using a rotary cutter)
*Cutting Mat (Only necessary if you’re using a rotary cutter)

Step-By-Step Directions
Follow our how-to instructions to make your own reusable, no-waste kitchen scrubby sponges.
1. Cut the fabrics
Using your rotary cutter (or scissors), Cut one 5” x 7” inch piece from the cotton fabric, the terry cloth, and the mesh. Next, cut one 3” x 5” inch piece of the poly batting. Fun fact, polyester batting is naturally mildew resistant!

2. Layer and Assemble the Pieces
Place the cotton fabric and terry cloth pieces together with the right sides together. Put the mesh in between the cotton and terry cloth. Secure the sponge sandwich together by using sewing pins along the outer perimeter. Using your sewing machine sew a 1/2” inch seam allowance around all the sides. Be sure to leave 3” inches or more open on one of the short sides. (This is where you will turn the fabrics and insert the batting later.)

3. Clip and Turn the Sponge
After sewing the side seams, clip off the corners of the sponge. You want to cut close to the stitching, but make sure that you don’t cut the stitches. Now, turn the sponge right-sides-out by pulling the fabric through the 3” inch opening.

4. Insert the Batting
The polyester batting adds absorbency and texture for cleaning dishes. Once the sponge is turned right-sides-out, insert the batting into the sponge through the 3” inch opening at the top of the sponge. It may take a little fiddling and finagling to get the batting to lie flat inside the sponge.

5. Sew the Raw Edge Closed
Once you’ve inserted the batting, you need to fold the raw edge of the 3” inch opening so that it’s down inside the sponge. Use pins to secure it. Now stitch the opening closed using a 1/8” seam. This closing stitch will be pretty close to the edge of the sponge and barely noticeable.

6. Finish with Topstitching
Adding a topstitch helps hold the batting in place and gives the sponge a finished look. Sew a ½” inch seam allowance around the entire perimeter of the sponge. Your sponge is now ready to get to work on your dishes!

Kitchen Sponge Care
Rinse soap and squeeze water from your sponge after every use. This will keep the sponge smelling fresh until it’s time to be washed. Clean your reuseable kitchen sponge by tossing it into the washer machine with the rest of the household towels and drying thoroughly in the dryer.
Extra Shots
Remember that no-waste sponges are a scrap busting project. Fabric scraps can be found everywhere, so think about cutting up discarded cotton shirts, pants, or sheets for the cotton fabric pieces. Old towels or robes can be used for the terry cloth pieces.
Instead of ordering mesh off the bolt, you can cut up a lingerie bag! Any local dollar store usually carries them.
If you always wished that sponges came larger, now is your chance. Add an inch to the fabric measurements here. If you want more padding...add a little more batting. (You're an adult, you can do what you want!)
Kitchen sponges make fun gifts for a housewarming or bridal shower when you make them with colors and prints that pertain to the receiver’s kitchen colors, hobbies, or interests.
Download Our Free Printable Project Planner!
Join us for handmade hacks and inspiration.
{Plus, the freebies}
(Our newsletter subscribers are precious to us!)
Hello My Creatives!
I 'm Chris
Makers gotta make, am I right? For creatives like us, making stuff brings joy to our hearts and soothes our souls like nothing else can!
At the heart of the Hold My Coffee brand is the belief that everyone deserves to experience the joy of making, regardless of how much time they have or how “perfect” the outcome is.
I'm here to remind you that it’s not about the size or perfection of a project—it’s about taking time for yourself, reconnecting with your creativity, and finding happiness in the process.
At Hold My Coffee {I gotta make this}, we scratch that sewing itch daily. We're top-tier enablers loaded up on caffeine. We've got your back.
We believe that perfection is an illusion. We encourage you to go 'off-pattern' and make it authentically you!


© Copyright 2023 Hold My Coffee {I gotta make this}
Privacy Policy / Disclosures & Disclaimers / Terms of Service